How to try the library
Get samples
Latest source code of the samples for Inetlab.SMPP library you can find on the link. Or you can download zip archive with all samples.
Start Demo Apps
Install Visual Studio 2017 or Visual Studio 2019 on your PC before starting the following .bat file.
Unpack ZIP and run file run_demo.bat in “smpp-samples-master” folder. In a console window appeared you might see the question – respond with “Y” for starting samples compilation. After this (and further launches) of run_demo.bat you should see two demo-applications started: "Inetlab.SMPP SmppServer Demo" and "Inetlab.SMPP SmppClient Demo".
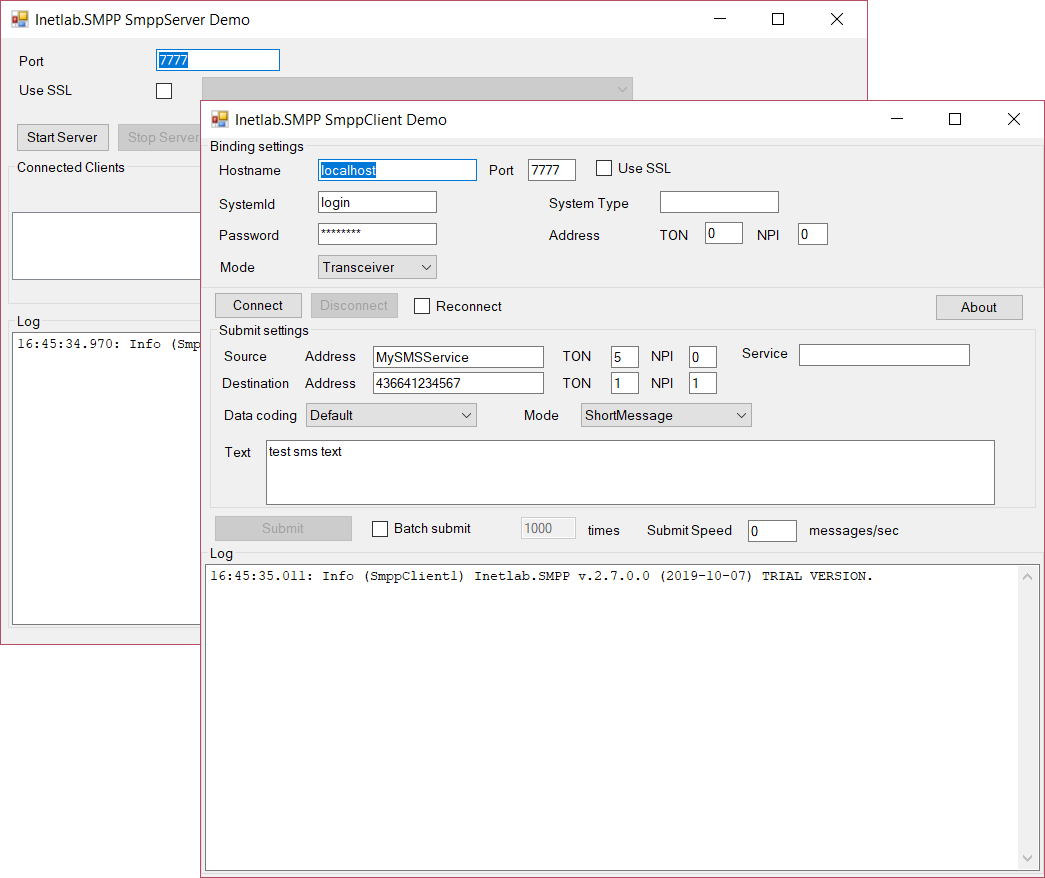
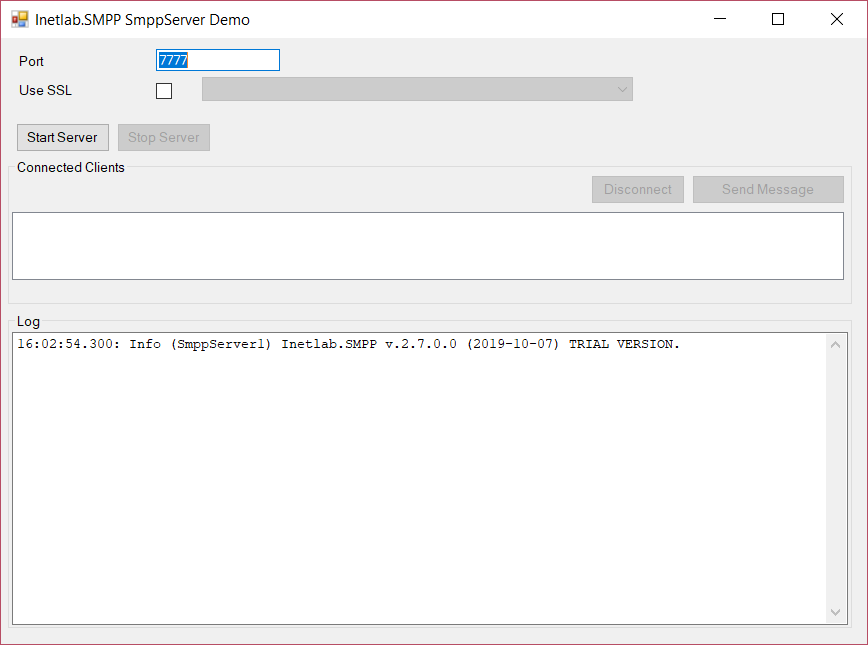
Press button "Start Server" in the "Inetlab.SMPP SmppServer Demo" application
You might see firewall warning "Windows Security Alert" after button "Start Server" is pressed.
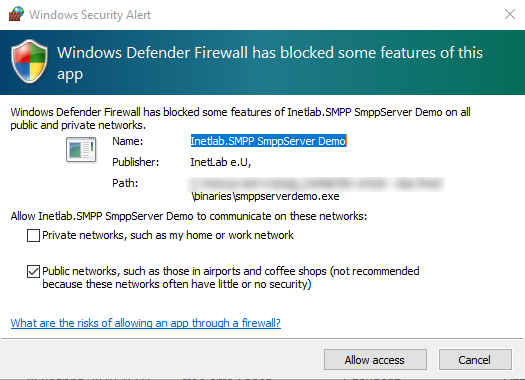
For the application SmppServerDemo.exe to work correctly, you need to accept this Windows Defender Firewall request by pressing "Allow access" button.
After starting SMPP-server, the "Start Server" button will be disabled and the "Stop Server" button will become clickable. Since that moment your computer acts as an SMPP-server reachable at addresses: localhost:7777, 127.0.0.1:7777 as well as via IP-address of your PC in the local network (Ethernet or Wi-Fi) at port 7777.
Demo-program starts SMPP-server on port 7777 by default. Of course, you can type in any port number you prefer before getting server started. Mind the server port when connecting with SMPP-client on the next steps.
Showcases
Connect “Inetlab.SMPP SmppClient Demo” to “Inetlab.SMPP SmppServer Demo”
Demo-application “Inetlab.SMPP SmppClient Demo” already set with default server address (localhost) and port (7777) values matching default demo-server application settings. Press “Connect”, to get SMPP-client connected to the SMPP-server implemented by “Inetlab.SMPP SmppServer Demo”.
Application "Inetlab.SMPP SmppServer Demo" now should have a line of text in the field “Connected Clients” showing “SystemId” of the SMPP-client connected. In our case, it should be “SystemId: login”.
Now Log-fields of both applications should contain some lines of debug information related to the connection established.
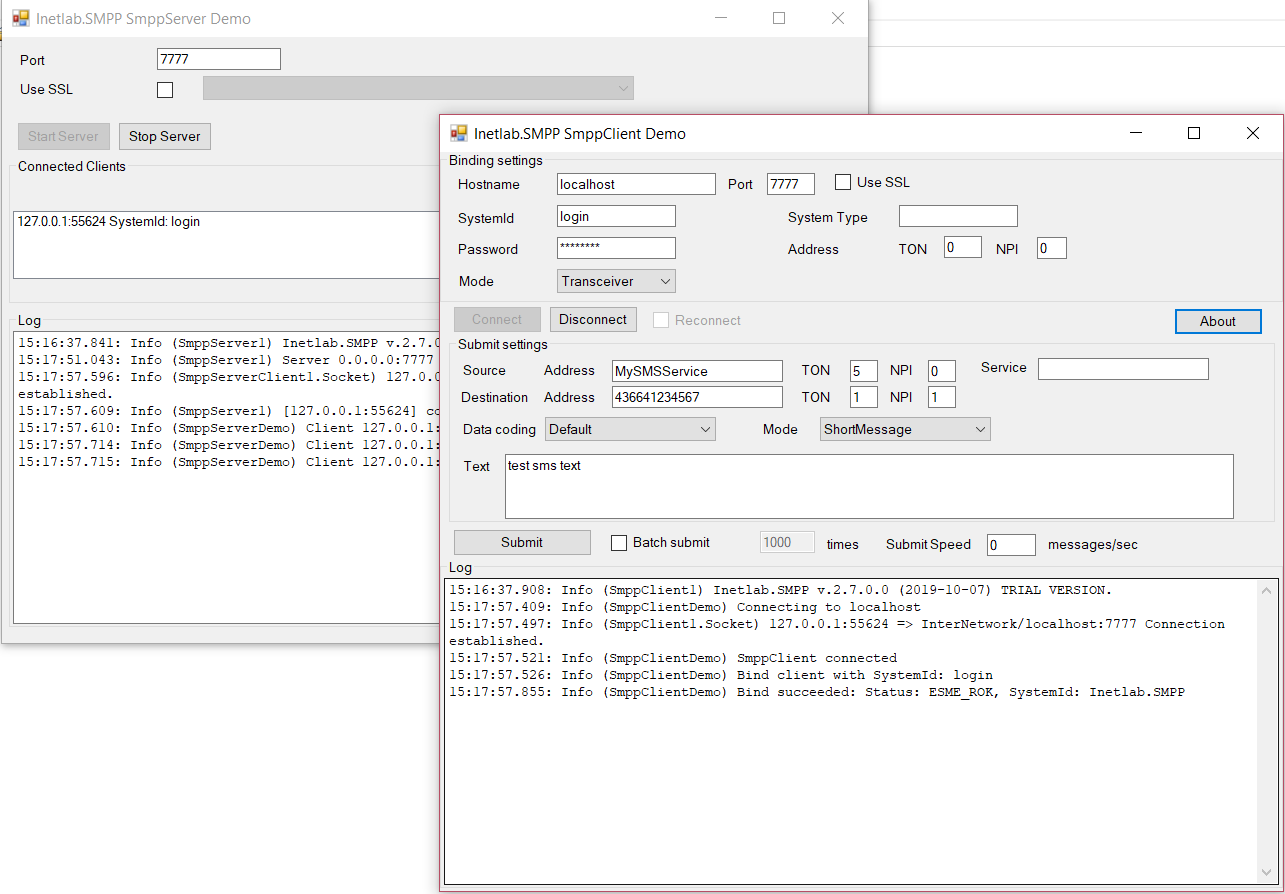
There should be a record "Bind succeeded: Status: ESME_ROK, SystemId: Inetlab.SMPP" in the Log-field of "Inetlab.SMPP SmppClient Demo" window.
Submit batch messages from client to server
Let’s make a batch sending of messages from client to server. Check the checkbox "Batch submit" next to "Submit" button in "Inetlab.SMPP SmppClient Demo" window. There is a preset value of 1000 for sending 1000 test messages in a batch. Default Submit speed is “0” – which means there is no delay performed between each message submission. Press "Submit" button to start.
The new record saying "Submit message batch. Count: 1000. Text: test sms text." should appear in the LOG-field of "Inetlab.SMPP SmppClient Demo" window. It should be followed by records "Batch sending completed. Submitted: 1000, Elapsed: 147 ms, Performance: 6802.721 m/s" (your digits may vary). It means the SMPP-client have just sent 1000 messages to the server.
In Log-field of server application window you will see plenty of similar records (a thousand in fact):
… [timestamp]: Info (SmppServerDemo) Client 127.0.0.1:55624 sends message From:MySMSService, To:436641234567, Text: test sms text[TRIAL] [timestamp]: Info (SmppServerDemo) SMS Received: test sms text[TRIAL] …
This example does not use any kind of looping in a code. It just prepares the collection of messages (1000 of identical messages in this example) and sends to the server with a single command. The code performs sending with single asynchronous operation. Collection may contain messages with varying recipient numbers and message bodies. The software automatically collects all related server responses and returns them as a single collection. "Message speed" parameter sets the delay between messages. It is useful to avoid “throttling” (throttling error) – special kind of an SMPP-server restriction applied to an SMPP-clients sending messages too fast. You can read more about throttling in the article Throttling error.
Submit Cyrillic text message in UCS2 encoding from client to server
Let’s put some text containing Cyrillic symbols into “Text” field of “Inetlab.SMPP SmppClient Demo”– for example "это тестовое sms". Choose UCS2 in dropdown menu “Data coding”. Press “Submit”. There should be a new record in the Log-field of "Inetlab.SMPP SmppServer Demo" window:
[timestamp]: Info (SmppServerDemo) Client 127.0.0.1:53233 sends message From:MySMSService, To:436641234567, Text: это тестовое sms[TRIAL] [timestamp]: Info (SmppServerDemo) SMS Received: это тестовое sms[TRIAL]
Message successfully delivered to the SMPP-server. Please note, if you keep the default value in “Data coding” dropdown, you will see all Cyrillic symbols arrived to server as question marks.
You can read more about text encoding in the article Map Encoding.
What detailed log looks like?
Log-fields of client and server are populated with new information thanks to a Logger embedded in the Inetlab.SMPP library. The embedded logger creates text records reflecting the meaning of current operations automatically. The default logging level is "Info". For example, this is how Log-field of SMPP-client looks like when launched and connected to an SMPP-server (log level "Info").
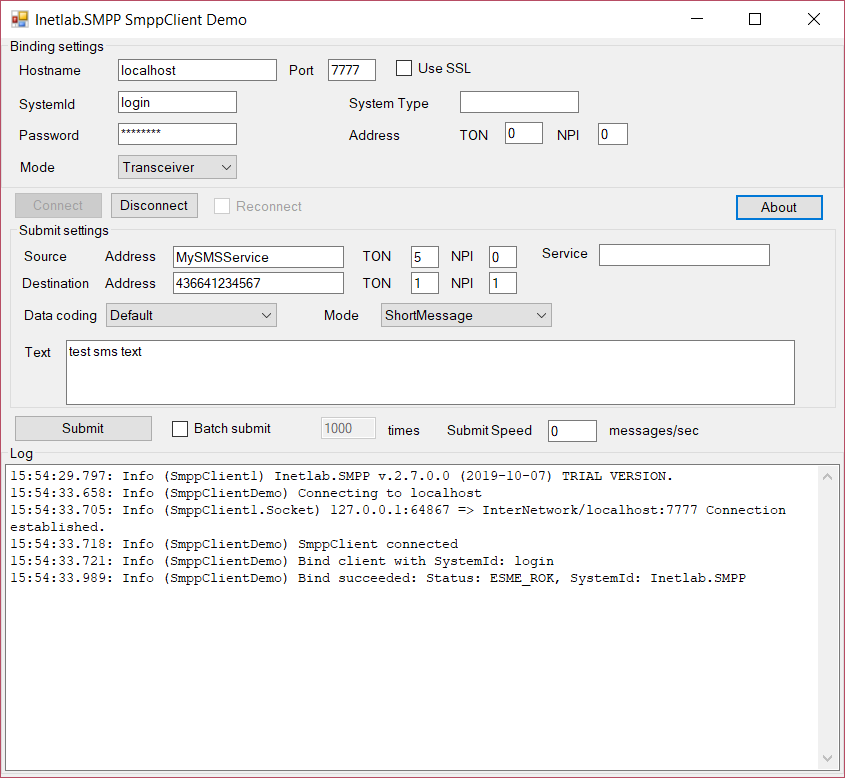
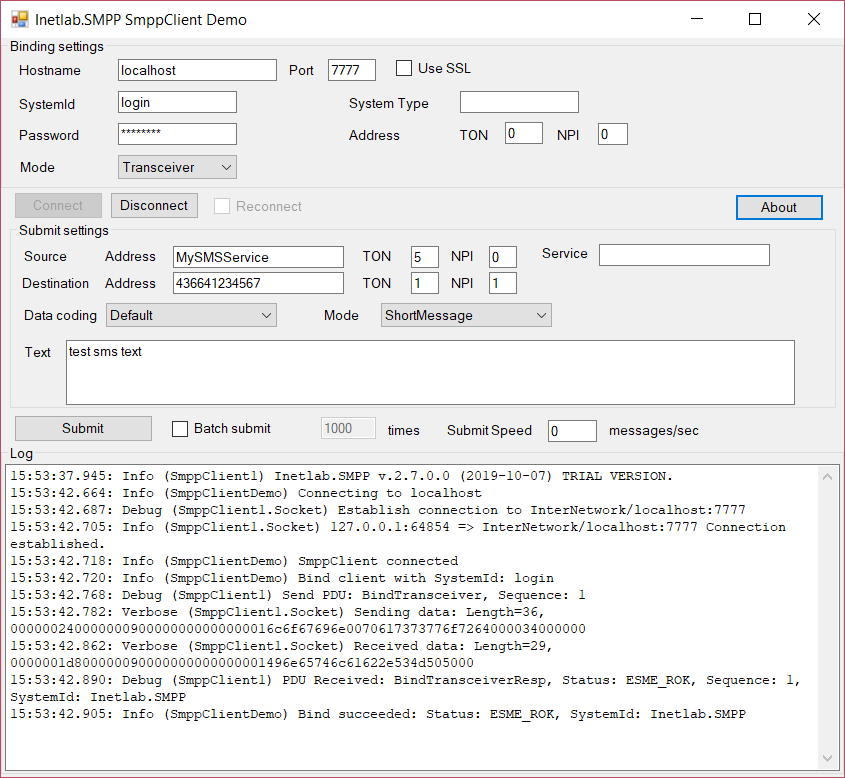
To change logging level it is necessary to change logging settings in the source code of SMPP-client and compile the project again. For example, by setting "Verbose" level in logger settings (showing much more technical details when “Info”) you will get more information in the logger output. Log-field will have additional records marked as “Verbose” and “Debug”.
You can read more logging and logging levels in the article Creating local and global Logger.
Send a message from server to client selected
There is a list of all SMPP-clients connected and their respective logins in the “Connected Clients” field of "Inetlab.SMPP SmppServer Demo" window.
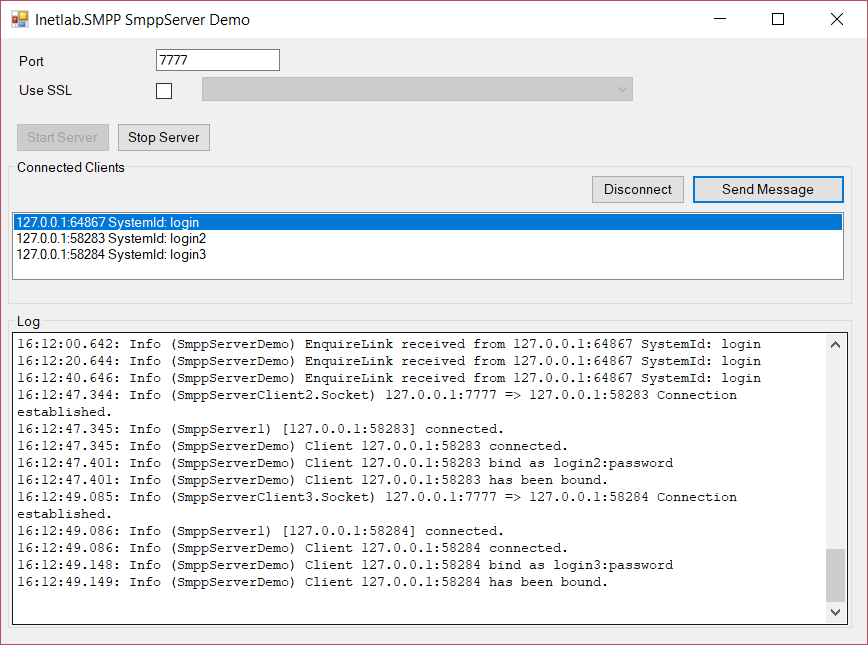
If you click a line containing client login (for example, “SystemId: login”) and the press "Send Message" button at the right side of the window, you will be able to message the SMPP-client by filling a form.
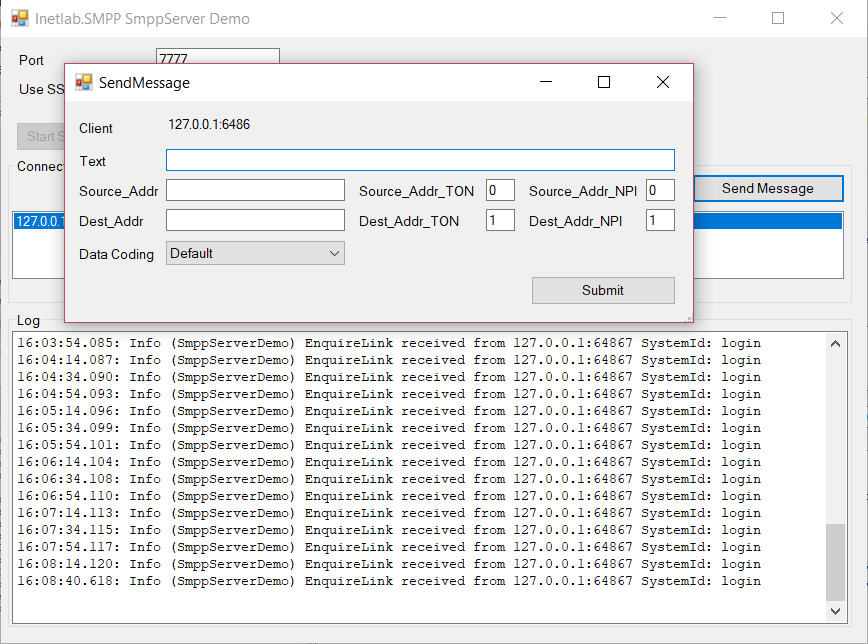
Let’s fill the form with arbitrary information:
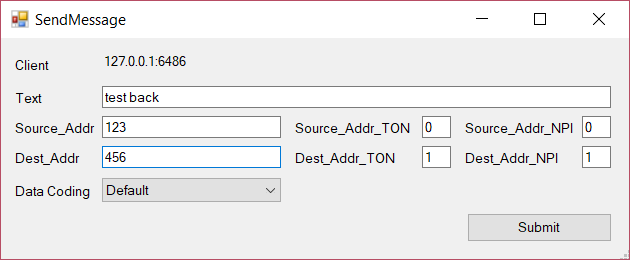
After filling all fields and pressing "Submit” button the message will be sent to the SMPP-client. By having a look at the Log-field of SMPP-client application, we can confirm if the message received. The similar record should appear:
… [timestamp]: Info (SmppClientDemo) DeliverSm received : Sequence: 1, SourceAddress: 123, Coding: Default, Text: test back[TRIAL] …
As next step you can begin to create your own SMPP Client or SMPP Server application.